Testing Settings
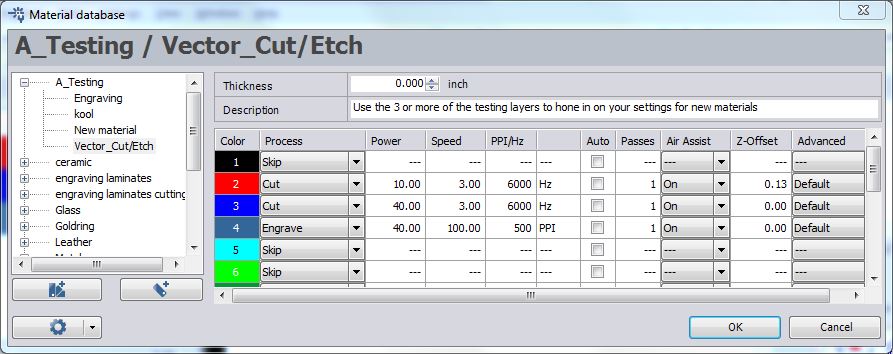
Our first step will be to verify the power, speed, and Hz settings for the material we would like to use. You will need to go through this process for any new material you are not sure about. Pick the Material Templates Icon, (or press Ctrl+M).
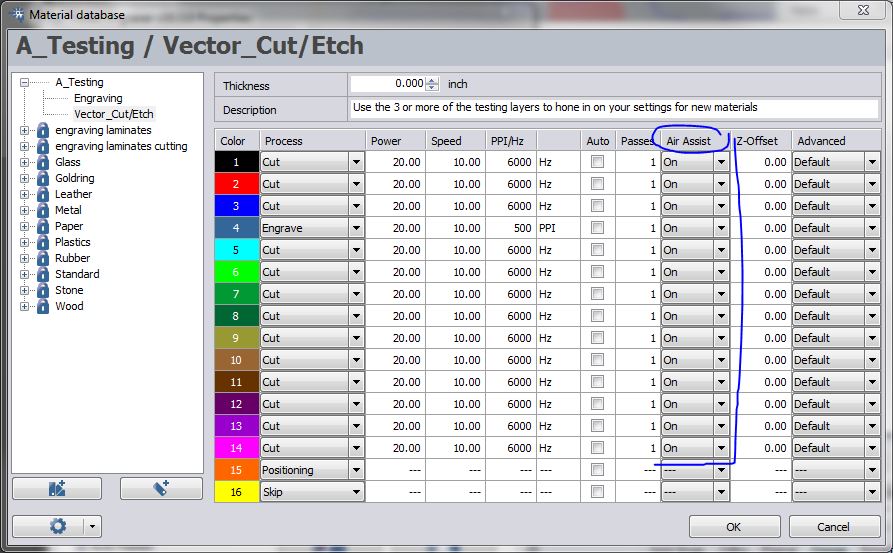
We will pick a range of settings, only changing one variable and keeping the rest constant.
In this case I am cutting cardboard so I guessed at a range around the recommended setting for cardboard. If you believe that the material database on the computer has been 'buggered up' you may download a fresh database here.
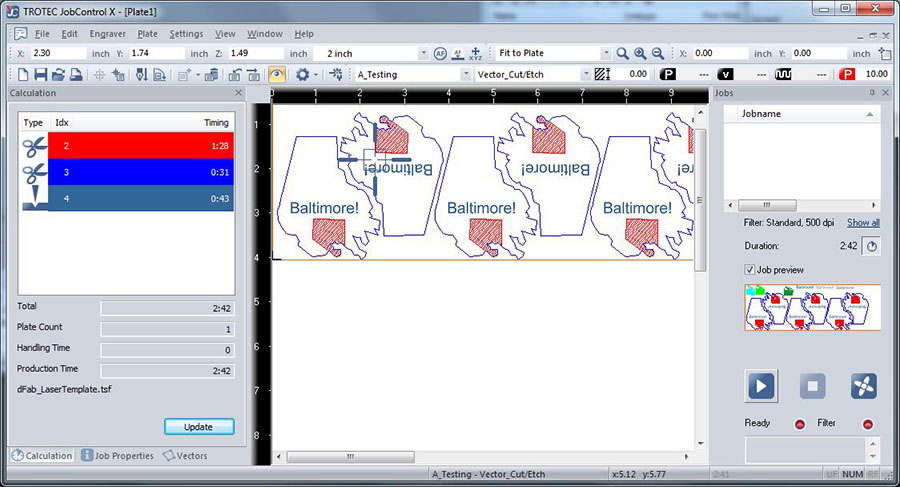
Once I click OK, only the three layers that are set to cut will be displayed and a estimate of the production time will appear on the left hand side. The software displays all hatched geometry such as text, but if it is on a 'skip' layer it will be skipped.
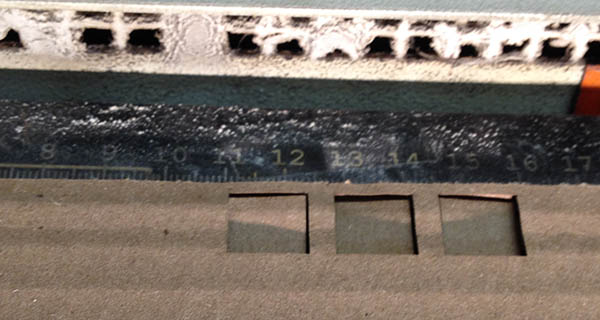
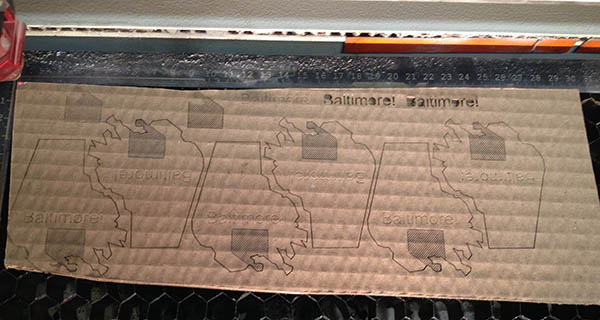
This is how they looked after being cut. Pretty close! They all cut through which may not be the best for an example, but I think they are good enough. The left had the low power, right had the high power and center was the recommended setting for cardboard.
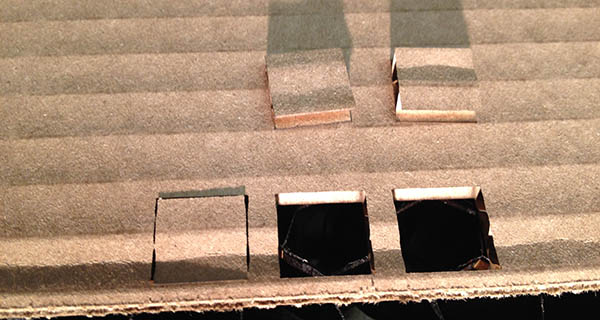
As you can see, the left hand square cut all the way through but stuck in the sheet. The other two fell down immediately after being cut. I'd say this entire range of power is acceptable, but there are some clear advantages to both sides of the spectrum.
For a large sheet of tiny objects, the lower power setting would be great because ALL THE PIECES WILL STAY CONNECTED TO THE SHEET! You could cut multiple sheets this way stacking them carefully, then take back to your studio to weed out. This can save you a ton of time picking small pieces out of the table with tweezers.
On the other hand, the higher power setting would be useful if you were having problems with pieces getting stuck in some areas and tearing the sheet, or if for instance you were working with acrylic sheet and the parts keep re-welding to the sheet.
Next up is an etching setting for vectors and for raster or 'engrave' text.
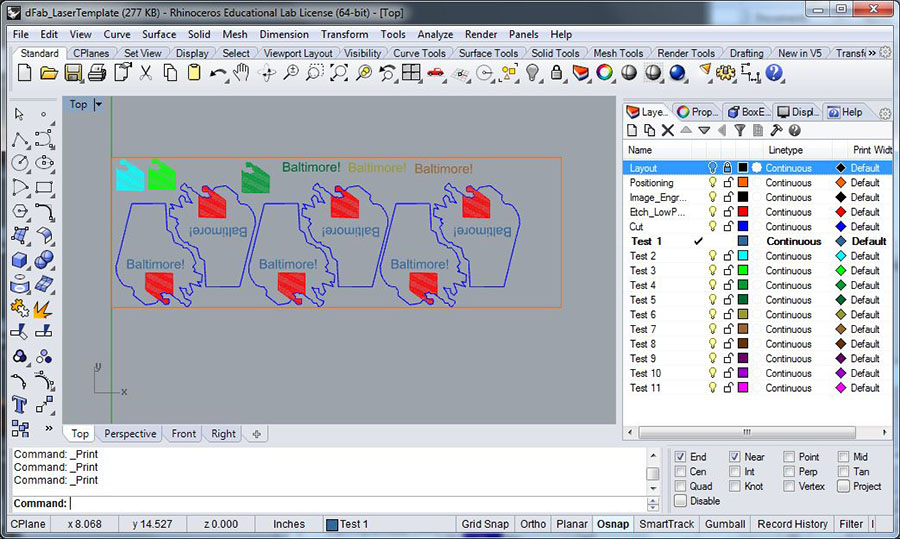
With complicated geometry, It's best to take a small sample and test that. In this case we're interested in the text and Baltimore city hatching. This hatching is a little strange, it's actually lines that have been offset to create the effect rather than from the hatch command so that it will engrave like a vector.
So we'll print that.
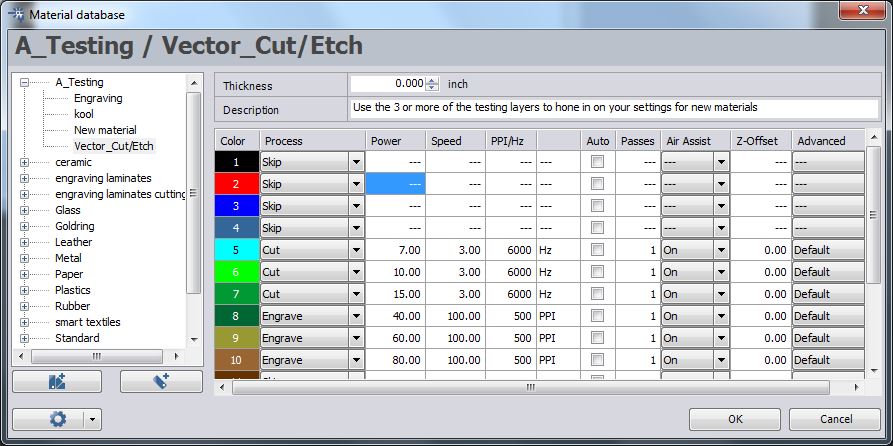
Here are the test settings I used. It's good to create a pretty large spread, be careful at first, you could choose some settings that would start a fire. And remember to turn Air Assist on!
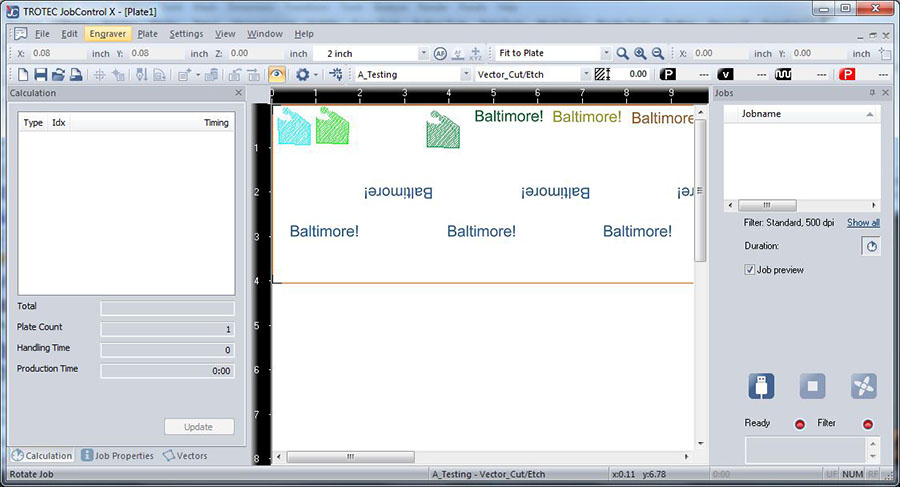
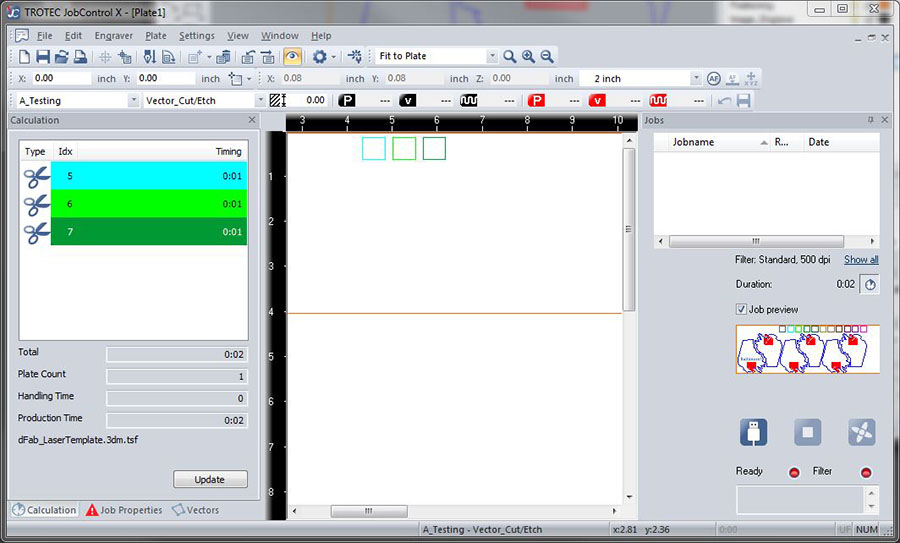
Don't worry that the text is not hidden. The layers that are not set to skip will be skipped.
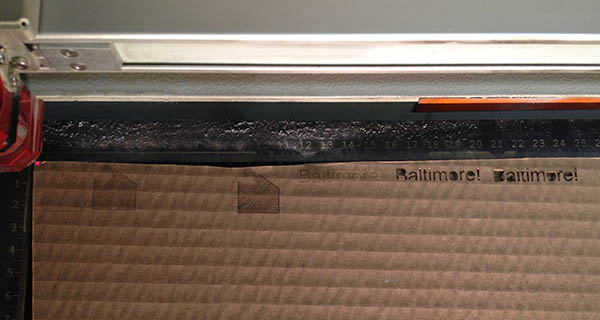
Here is what was cut. I'm happy with the value for the text. It's a little light, but any deeper and it will probably cut through the top layer in some spots. I like the second value for the vector etching.
So we put the settings we like back into the Material Database and send the file.